一直以為 Google Cloud 的服務是要收費的,
想不到它竟然提供有 300 美金一年的免費試用期。
這麼好康的服務不來給他試用一下怎麼可以呢!


話不多說,立馬點選「免費試用」一起來體驗吧!
國家/地區選:台灣,其他都選「是」最後點選「同意並繼續」

接下來就是把「個人資料」和「信用卡」資訊填入,就可以開始使用了!
其實這邊比較讓人有 疑慮 的就是
「輸入了信用卡資料」怕如果將來忘了取消試用專案,
Google Cloud Platform 會自己從信用卡中自行扣款。
不過還好 Google Cloud Platform 有特別聲明,
如果不是用戶自己手動 升級 為 付費帳戶,系統是不會收費的。
所以就讓我們大膽的給他申請下去吧。
- 使用所有 Cloud Platform 產品
- 取得建構及執行應用程式、網站和服務所需的一切資源,包括 Firebase 和 Google Maps API。
- 免費獲得 $300 美元的試用額度
- 申請試用即可獲得 $300 美元的試用額度,可於未來 12 個月內在 Google Cloud Platform 上使用。
- 免費試用期結束後不會自動向您收費
- 我們之所以要求您提供信用卡資訊,是為了確保您不是自動化程式。除非您手動升級至付費帳戶,否則我們不會向您收費。

填完信用卡相關資料後按下確定鍵後,系統就會開始建立專案
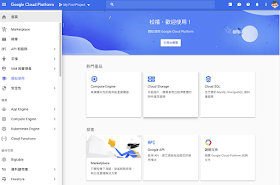
 接下來就會看到 Google Cloud Platform 控制台相關的畫面了。
因為我的目標是建立 Google Cloud Platform 網頁伺服器,
其他的服務就沒有在這邊討論,因為我也不會啊!
申請時有提到,如果用戶沒有自行點選「升級」系統就不會扣款。
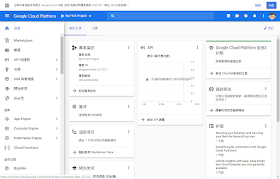
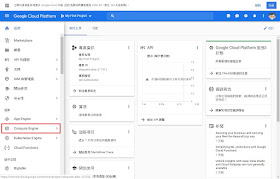
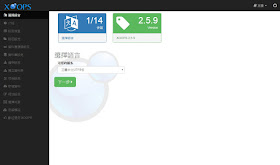
接下來我們來了解一下控制台的資訊主頁
我們的這個專案叫做「My First Project」
Google Cloud Platform 的運作方式都是以專案的形式,
所以你可以建立許多的專案,將來不要使用時再把專案刪除即可。
當然你也可以「前往專案設定」去更改名稱。

我這邊把專案重新命名為 「www-server」
這樣以後如果專案愈來愈多,才知道這個專案的用途
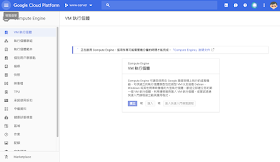
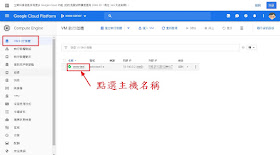
接下來就要來建立第一個虛擬主機了!
請點控制台選左邊選單「Compute Engine」
第一次使用需要一些時間,請耐心等候吧!
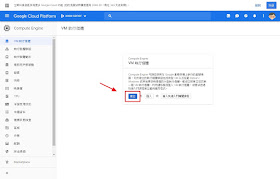
系統準備好後,你就可以開始 建立 VM 主機了
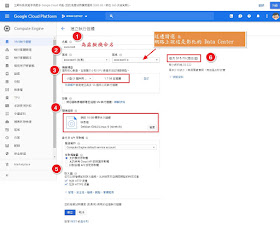
建立 VM 主機時要注意以下這幾個地方:
1.為虛擬機命名
2.區域選 台灣 - Asia-east-a(Asia-east-a 是彰化的 DataCenter)
3.CPU 等級會影響每個月的價錢,這邊我選共用的就可以了。
當然既然有免費的 300美金,你也可以選等級比較高的 CPU
4.選擇你常用的作業系統
5.防火墻這邊要記得勾選,不然會無法對外連線(清展老師幫大家試過了!)
6.系統會根據我們選的 CPU、硬碟大小 自動統計每個月需要的費用
設定的這台每月需 15.73 美金,大概算 16 美金 * 12月 約 192 元
一年下來免費的 300 美金額度都用不完呢!所以可以大玩特玩喔!
點選建立後,系統就會自動建立一台已經具備好作業系統的伺服器
不過它只包含了 SSH 服務,其他的還是需要自行安裝。
對了,我模擬的這台作業系統最後選的是 CentOS7
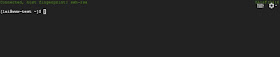
點選 SSH 開啟 主機 終端機
到這邊應該虛擬機就完成了,
可是要作為網頁伺服器還需要安裝 apache、php、mysql....等服務
這是彰化縣永靖國小邱顯錫老師所分享的腳本,
只要跟著操作 XOOPS 就架好了。
當然你也可以跟 弘凱老師 XOOPS 輕鬆架 喔!
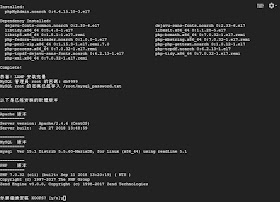
Google Cloud Platform 虛擬機要切換 root 請輸入
#sudo su
切換到 root 的角色後就可以接著 顯錫老師的步驟操做了
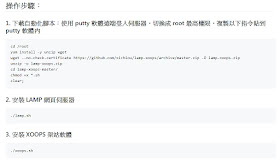
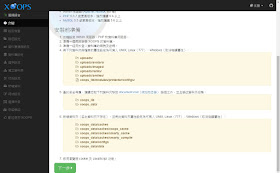
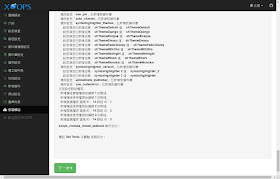
1.直接複製下列全部語法到終端機中
cd /root
yum install -y unzip wget
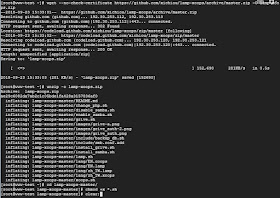
wget --no-check-certificate https://github.com/xichiou/lamp-xoops/archive/master.zip -O lamp-xoops.zip
unzip -o lamp-xoops.zip
cd lamp-xoops-master/
chmod +x *.sh
clear;
2.執行完會停在 clear;最後點選 enter 鍵就完成了。
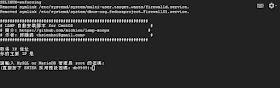
3.複製 ./lamp.sh 直接貼在終端機中,按下 enter 系統就會自動安裝
4.請輸入「MySQL」的密碼,如果不輸入系統預設為 db9999
請跟著紅色的註解操作
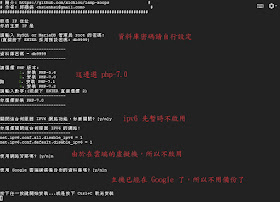
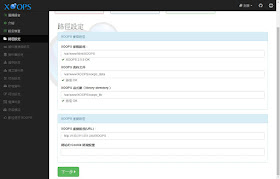
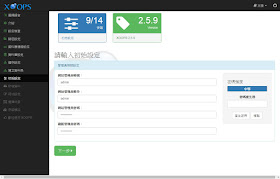
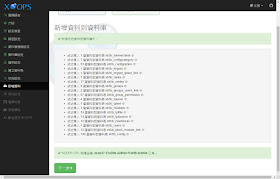
到這邊伺服器環境已經設定好了,輸入 「y」 繼續安裝 XOOPS
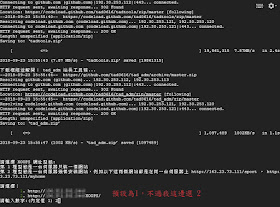
如果你不太確定,也可以選擇「預設值」也是可以的
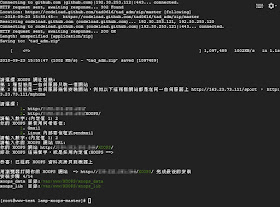
「最後二行綠色字體很重要,網頁安裝 4/14 時會用到,請記得路徑」
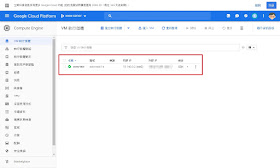
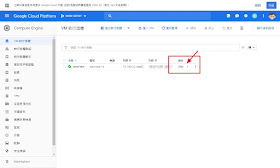
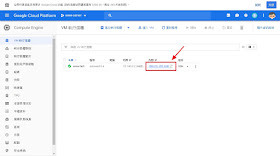
到這邊就可以回到 Google Cloud Platform 控制台
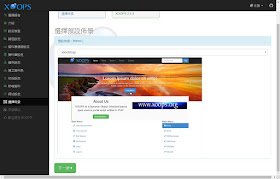
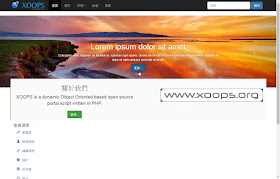
點選「外部 ip」 連結到網頁首頁
點選時可能會出現 錯誤訊息,原因是 http 網址多了個「s」 要記得移除
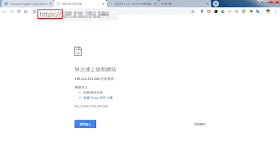
這樣就可以正常進到 XOOPS 網站中進行後續的設定了
剛剛綠色字體的提醒

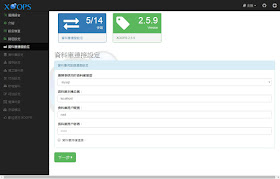


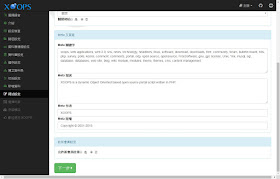
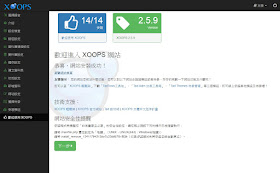
到這邊 XOOPS 就能正常使用囉!
接下來就是如何讓本機端電腦和 Google Cloud Platform 的 VM 連結了


如果要利用上述的程式連接 Google Cloud Platform 的 VM 機器
桌機還需要一個可以產生金鑰的程式

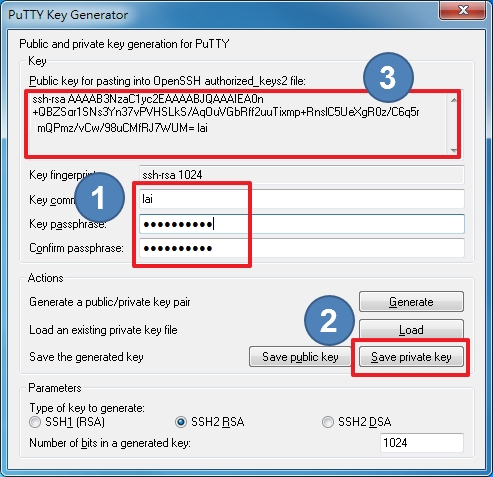
執行程式後,請依照下列的步驟
1.請選 SSH2 RSA、2.點選 Generate、3.在上方區域左右移動

- 請在 1 的部分輸入「Google 帳號」和「 該帳號密碼」
- 點選 2 「Save private key」儲存「私鑰」副檔名請自行設為 ppk --> WinScp
- 接下來標示 3 的區塊中就會產生「公鑰」--> 複製貼到虛擬機中
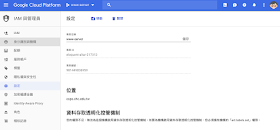
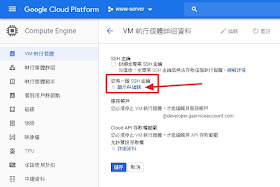
請將上方框框中的 公鑰 複製貼到 VM 虛擬機設定檔中

點選「顯示與編輯」
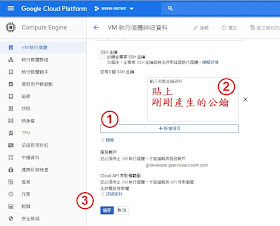
1.點選「新增項目」、2.貼上「公鑰」、3.儲存
接下來到 WinScp 中設定
中設定
中設定
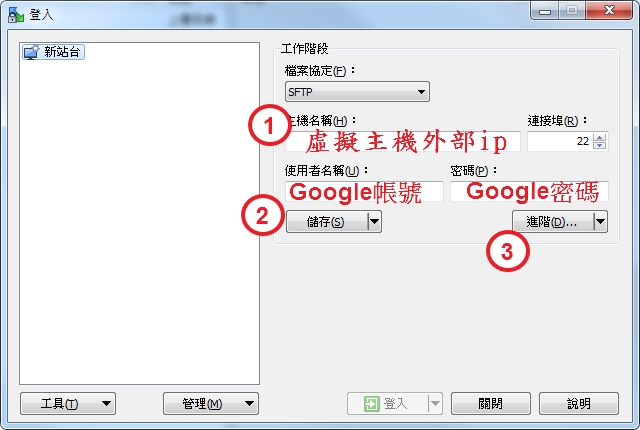
1.輸入 VM 的 外部ip
2.輸入帳號、密碼 後先「儲存」
3.儲存後再點選「進階」做細部設定
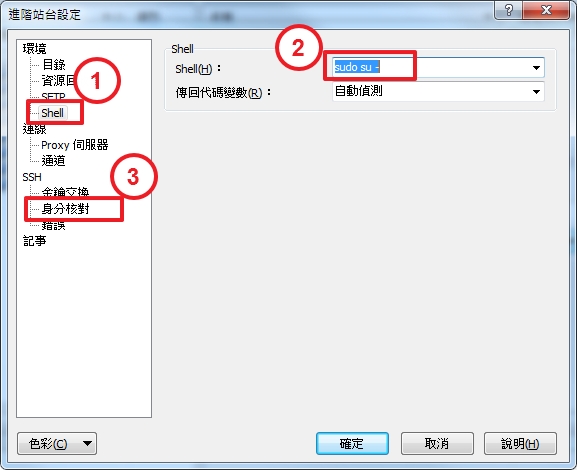
1.Shell 的部分
2.記得更改為 「sudo su -」不然很多事情無法操作
「不知少了那個設定,目前好像還是無法在 home 以外的地方操作」
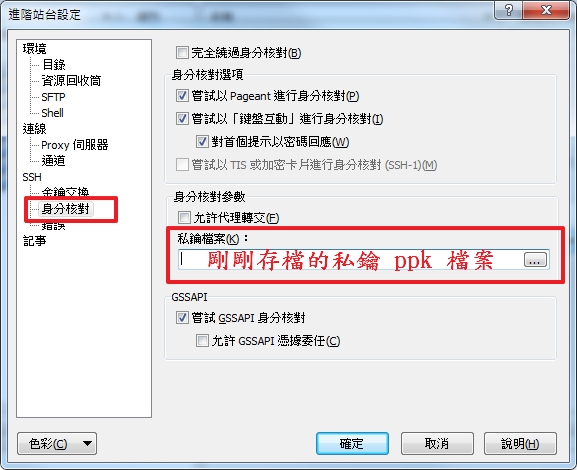
3.點選「身份核對」- 私鑰檔案位置
接下來就可以來驗證 WinScp 是否可以正常連線了!
好,到目前為止網站應該可以正常運作了,
但 VM 機器目前在 Google Cloud Platform 、 ip 也是 Google 提供的,
那怎麼把學校網域跟 ip 相互對應呢?
剛好遇到頂番國小清展老師,和清展老師討論後,
清展老師說只要在 DNS 伺服器中,新增一筆 A 記錄就可以囉!!
新增後記得重啟服務喔!
www IN A 「VM的外部ip」
到這邊應該就是這次的 Google Cloud Platform 初體驗了,
歡迎大家一起分享使用心得吧!!
當然要是有什麼好用的服務,也歡迎留言分享喔!!
沒有留言:
張貼留言
歡迎大家一起留言討論!